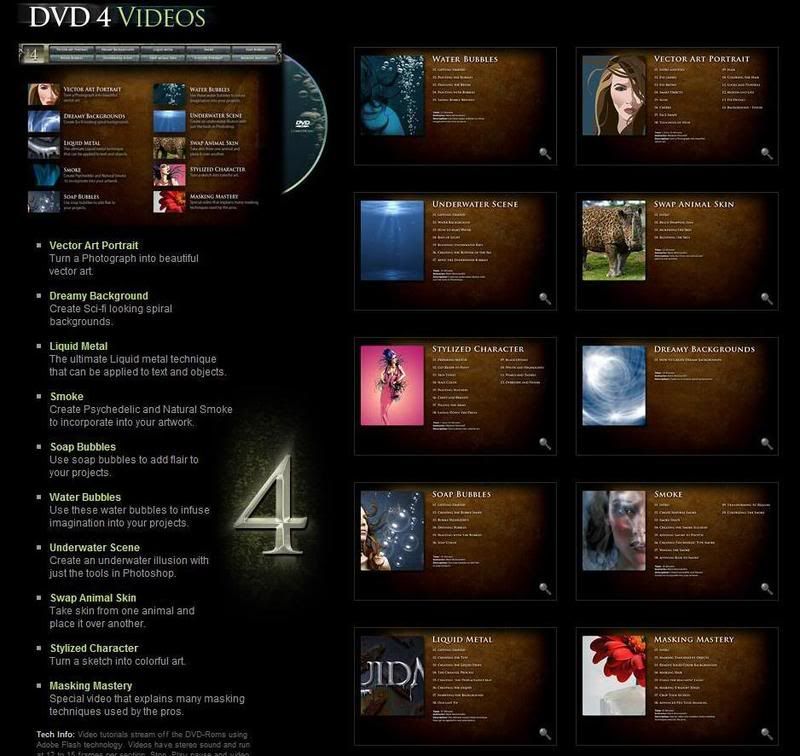
31 August 2008

Brushes for Photoshop - Winter Breeze

View more >>

Musics PSD Collection 4

Musics PSD Collection 4

Musics PSD Collection 4
3 PSD files | 2600x4000px | unzipped 157MB


Musics PSD Collection 4

Download PSD#1: Easy-Share - Rapidshare - Depositfile

Musics PSD Collection 4

Download PSD#2: Easy-Share - Rapidshare - Depositfile

Musics PSD Collection 4

Download PSD#3: Easy-Share - Rapidshare - Depositfile

View more >>

OnOne PhotoTune 2.2

View more >>

30 August 2008

create a logo in 5 mins

View more >>

29 August 2008

Amazing 3D-Art Wallpapers and Backgraunds

Amazing 3D-Art Wallpapers and Backgraunds

Amazing 3D-Art Wallpapers and Backgraunds
33 JPEG | 11 Mb

View more >>

Butterfly Font Design


Info:

This package contains 26 upper case letters of the historic font, "Albemarle Swash", rendered in highly reflective and beautifull bevelled metals in very large sizes, at 300 dpi, making them suitable for print purposes as well as webgraphics. They are provided in individual png files with a transparent background for ease of use.


http://rapidshare.com/files/135528402/Butterflyfont_kurds.rar


Password: kurdsportal.com

View more >>


View more >>

25 August 2008

Professional 2008 Photoshop Brushes


Professional 2008 Photoshop Brushes 7 | 21.08 MB


Şifre | PASSWORD: www.downturk.info

http://rapidshare.com/files/139868308/VINEYARD.rar

View more >>

23 August 2008

Digital Film Tools Digital Film Lab 2.5 For Photoshop


Info:

The ultimate film look plug-in
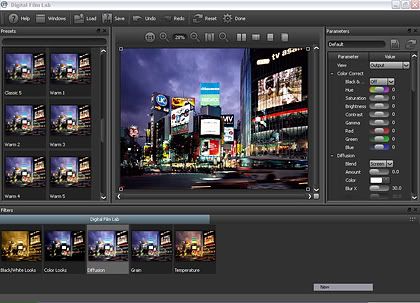
Digital Film Lab simulates a variety of color and black and white photographic looks, diffusion and color grad camera filters, lighting gels, film stocks and optical lab processes. The power of the plug-in lies in its presets which can be loaded to achieve a variety of different effects. There are over 135 useful presets organized into black and white looks, color looks, diffusion, grain and temperature. Feel free to use our presets, modify them or create your own.


Features:

Color Correct
Color Correct manipulates the Black and White, Hue, Saturation, Brightness, Contrast, Gamma, Red, Green and Blue values of the image.

Diffusion
Diffusion creates atmosphere by reducing contrast while creating a glow around highlights or shadows. It simulates diffusion and fog filters as well aglows. In addition, a pre-built texture library allows you to add realistic diffusion
to scenes as if you were adding diffusion directly to your camera lens.

Color Grad
Color Grad colors and or darkens only a portion of the image giving you tability to simulate any Color Grad or ND (Neutral Density) Grad filter. Presefor your favorite color grad filters are provided as well as the ability to create


MAKING DIGITAL LOOK LIKE FILM
The quest to make video and digital images look like film has been going on f years now. Some have even grown entire businesses around this idea. Without making judgements as to which medium is "better" than the other, let’s swith the notion that video and film are completely different animals and both have their advantages and disadvantages. There are a number of factors to consider when attempting to achieve a film look: lighting, cameras and lenses, filters, depth of field, grain and frame rate. While some of these items are addressed during shooting, Digital Film Lab can simulate many of them digitally.

Lighting
In our opinion, the most important factor in achieving a film look is lighting. Don’t just blast a scene with light. Make sure that you employ modeling in yo lighting, making sure that the shadows have some detail and that you don’t completely blow out highlights. Video and digital cameras have a narrower contrast ratio than film and the limits of their brightness range are sharply defined, whereas film gently rolls off in the whites and blacks. Remember, you can always digitally make the shadows darker and the highlights brighter. Going in the opposite direction is murder and yields lousy results.

Cameras and Lenses
Another factor in achieving a film look is the video or digital camera. They frequently have their Detail or Sharpness settings cranked up. Detail controls the sharpness of the image and creates jagged, aliased edges. The first thing to do before shooting is to turn the Detail or Sharpness down. This can be accomplished by adjusting either a menu or pot inside the camera. Once turned down, it is harder to focus but will soften edges.Depth of field also plays a role in the way film is perceived and is a measure the amount of picture that is in focus. Video and digital cameras differ fro35mm film in that they have a much greater depth of field. This is a result of cameras CCD’s being physically smaller than 35mm film frames.

http://rapidshare.com/files/119576118/Digital_Film_Tools_Digital_Film_Lab_2.5_For_Photoshop.rar


Password: kurdsportal.com

View more >>

3D Animals Wallpapers


Info:

33 Funny images in 1280 x 1024 resolutions

http://rapidshare.com/files/128494295/3D_animal_kurds.rar

Password: kurdsportal.com

View more >>

Font Diner Complete Collection


Info:

Font Diner Complete Collection
141 TTF + 84 PSType1 | 13.2MB


http://rapidshare.com/files/134470722/The_Complete_Font_Diner_Collection.rar

Password: kurdsportal.com

View more >>

Candle Lights Wallpaper


Info:

40 beautiful images in 1280 x 1024 resolutions.

http://rapidshare.com/files/131484091/Candle_light_wall_kurds.rar

Password: kurdsportal.com


View more >>

Louvre Art Gallery


Info:

Louvre Art Gallery | 819 HQ RGB JPEG Images | 600 MB | RS

The Louvre is the national museum and art gallery of France, in Paris.
The painting collection is one of the richest in the world, representing all periods of European art up to Impressionism; its collection of French 15th–19th-century paintings is unsurpassed.

Now it is possible for you to enjoy this beautiful collection in your own home.

A Must have for Art lovers

http://rapidshare.com/files/133765087/Louvre_kurds.part1.rar
http://rapidshare.com/files/133765116/Louvre_kurds.part2.rar
http://rapidshare.com/files/133765158/Louvre_kurds.part3.rar
http://rapidshare.com/files/133811945/Louvre_kurds.part4.rar
http://rapidshare.com/files/133811963/Louvre_kurds.part5.rar
http://rapidshare.com/files/133696005/Louvre_kurds.part6.rar


Password: kurdsportal.com

View more >>

22 August 2008

Cartoons Icons Pack


Info:

Five cartoons pack icons.
http://rapidshare.com/files/136901703/Cartoon_Icons_kurds.rar

Password: kurdsportal.com

View more >>

Comstock CS091 - Advancing Technology [RS]

View more >>

Weapons Wallpaper


download

Password: kurdsportal.com

View more >>

21 August 2008

Retro Dancers illustration

We will learn how to create a retro silhouette wallpaper


We create a new background with the dimensions of 500x400, 72 dpi and paint it with the color having a code shown with white color.


Then on the new background, using the Elipse Tool 
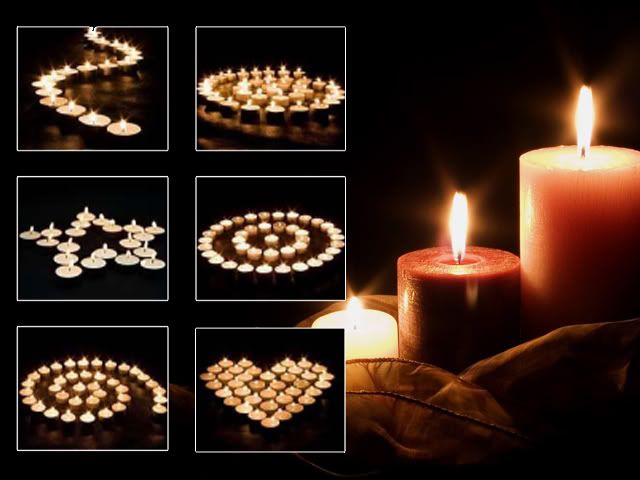
, create a nice circle:


Keep using the same Elipse Tool on the new backgrounds, create more circles of the same colour


…and several other circles:


Using the well-known instrument inside the circles we have already, create circles of smaller dimensions but with a different colour (the code is shown with the white colour):


We keep create new circles using the same methods:


Each circle must be created in it's own background, some of them of different shades. We'll use for this the option (fill):


Add more:


…and finally we got a space picture (the instrument , is shown with the red colour) Then we'll take the girl's photo and cut out the background using the instrument .


On this file, pressing the right button of the mouse choose the Blending options. Choose Colour Overlay and set out the black color.


The girl became a silhouette.


We'll add another girl:


Using the same methods for the previous girl. We should mention that the first girl and the second one are cut out and placed considering their future position in the picture. (a silhouette must not cover the other one).

If you did everything correctly you should have got this:


after that u can add any text u want !! or w/e .

*-*-*-*-*-*-*-*-*-*-*-*-*-*

View more >>

18 August 2008

Kung Fu Panda Signature


---
For the relief effect apply Filter > Texture > Texturizer with similar settings to these


---
Now we have a relief like this:


---
Then we bring picture of Panda to our signature. Actually you can use different pictures heroes of this cartoon. I prefer to use this one:


---
If you want to download the picture of Panda used above, please feel free: Panda
The next step what we need to add a lines to the background. Make selection with Polygonal Lasso Tool and fill our selection with a black color like on a picture below:


---
Press Ctrl+D to deselect chosen area and set up fill of 20% for this layer, then duplicate it with Layer > Duplicate layer. Now, head into the Blending Options for new layer, so right-click your layer and go into the Blending Options and apply the following layer styles:


---
Then set up fill of 0% for this layer. Create new layer with Layer > New > Layer and press Ctrl+J to merge with layer under.


Alright, now we need to cut away inner part of these lines. To do this, first get out the Elliptical Marquee Tool, then select an area, feather selection using Select > Modify > Feather (Feather Rarius of 100 pixels) and press Delete. We receive a picture like so:


Now we would like to make more contrast between Panda and background. What we want to do is apply Ellipse Tool to make a sphere as on a picture below:


For the image better apply Filter > Blur > Gaussian Blur with 95 pixels of Radius. Then mess with the layer mode & opacity/fill. I tried Overlay ( or anything u want ) with an opacity of 55%.


The next step what do we need to add some shadow on the floor under the Panda. Make selection with Polygonal Lasso Tool and fill our selection with a black color like on a picture below:


For the blur effect apply Filter > Blur > Gaussian Blur with 14 pixels of Radius and set up opacity of 70%.


Now let's add some text. Get out the horizontal type tool (just the regular one) and write out something like 'Kung Fu Panda' on two lines. For 'Kung Fu' use color of # eb3d1f and for 'Panda' use this one # ffcb20.


It will be more interesting to warp text like this:


Go to type layer with 'Kung Fu' and apply the following warp text properties :


For type layer 'Panda' warp text properties will be the next:


Now we need to rasterize text lines for the next transform, so right-click your layer and chose Rasterize Type. After press Ctrl+T to make free transformation, as on a picture below:


To add color shadow for lines press Ctrl+J to duplicate it and swap colors of lines, then press Ctrl+T again to transform lower duplicated layers like this:


For the relief effect apply Filter > Texture > Texturizer with similar settings to these:


Now we have a relief like this:


We can add shadow to upper text line to make text more realistic. Duplicate it with Layer > Duplicate Layer and apply Edit > Transform > Distort.


After get out the Rectangular Marquee Tool, then select an area, feather selection using Select > Modify > Feather (Feather Radius of 12 pixels).


Then delete shadow inside the selection and press Ctrl+D to deselect chosen area. Set up opacity of 60% for this layer. We receive a picture like so:


To bring our text lines more brightness apply Ellipse Tool to make a sphere as on a picture below


To blur this ellipse apply Filter > Blur > Gaussian Blur with 25 pixels of Radius. Then Set up opacity of 50%.


OK, to finish off with signature I think we should add some graphic elements in the background.
For example we can use Japanese brushes:


The brushes used above it's a free brushes that you can download from here : ( its on my personal file hosting ) : Download

We're done for this tutorial, thanks!

View more >>

new tutorials

Adobe Photoshop tutorial Photoshop effects image.halftone dot tutorialEasy Landscape TutorialPhotoshop text portrait effect. Image © 2009 Photoshop Essentials.com.http://psdfan.com/wp-content/uploads/2009/03/metfinal.jpgFinal ImageThe path around the dolphins has now been converted into a selection.Adobe Photoshop tutorial imageAdobe Photoshop tutorial image.The final result.Final Click