
29 September 2008
Fall Colors Hi-Res Images [RS]

Info:
IIC Fall Colors Hi-Res Images - Volume 01
150 Hi-Res Images
Size: 599MB
http://rapidshare.com/files/148700688/Fall.Colors.HQ.imgs.part1.rar
http://rapidshare.com/files/148700219/Fall.Colors.HQ.imgs.part2.rar
http://rapidshare.com/files/148699660/Fall.Colors.HQ.imgs.part3.rar
http://rapidshare.com/files/148699193/Fall.Colors.HQ.imgs.part4.rar
http://rapidshare.com/files/148698649/Fall.Colors.HQ.imgs.part5.rar
http://rapidshare.com/files/148698118/Fall.Colors.HQ.imgs.part6.rar
http://rapidshare.com/files/148697580/Fall.Colors.HQ.imgs.part7.rar
Password: kurdsportal.com
26 September 2008

25 September 2008

")

Creepy Characters Wallpapers [RS]
Info:
50 images in various resolutions
http://rapidshare.com/files/145191293/Monster_wallpapers_kurds.rar
Password: kurdsportal.com
Paint Graffiti on Wall in Photoshop

Preparations:
We will use an image of a wall (taken by RoCkBiGdAvE), Paint Drips brushes from elliottfelix and Graffiti Set 2 from Krakograff.
Click HERE to download the Graffiti brushes.
Click HERE to download the Paint Drips brushes.
Click HERE to download the image.
All rights of these resources belong to their respective owners.

Step 1 - Setting Up Background:
Create a document of size 750 by 550px.
Drag and resize (with Edit > Free Transform) the wall image into the document.

Step 2 - Adjusting Levels:
Create a Levels Adjustment Layer above the wall layer and enter the values 83, 0.72, 255.
Create another Hue/Saturation Adjustment Layer above the levels and enter 0 for Hue, 13 for Saturation and 4 for Lightness.

Step 3 - Graffiti Outline:
Load Graffiti 2 brushes downloaded earlier.
Create a new layer above the adjustment layers.
Select Pimp My Wall brush and set the size to 450. Change your foreground color to #000000 and paint the graffiti outline as shown in the diagram.

Step 4a - Painting Graffiti:
Create a new layer below the graffiti outline.
Using a Soft Brush tool with size 25 and color #E6B700, paint within the outline of PIMP.
It is fine to have some of the colors painted out of the line so it will look more realistic.

Step 4b - Painting Graffiti:
Repeat Step 4a for the rest of the words.
I used #6D98C3 for MY, #9F1D25 for WALL and #FFFFFF for the exclaimation.

Step 5 - Painting Shadows:
Create a new layer below all these colors.
Using a Soft Brush tool of size 100 and color #000000, paint in some shadow along the border of the graffiti.

Step 6 - Painting Outer Glow:
Create another layer in between the shadow and the colors layers.
Using a Soft Brush tool of size 100 and color #34C230, paint in some glow.
Try not to cover the shadows you painted earlier.

Step 7 - Painting Highlights:
Create a new layer above all the other layers.
Using a Soft Brush tool of size 25, color #FFFFFF and opacity 30%, paint in some highlights along the top border of every letter as shown in the diagram.

Step 8 - Adding Paint Drips:
Load Paint Drips brushes downloaded earlier.
Create a new layer above the highlights layer. Set the opacity of this layer to 40%.
Set the foreground color to #FFFFFF, paint in some paint drips at some ends of the highlights.

Step 9 - Adding Textures:
Duplicate the wall image and drag the duplicated copy to be the topmost layer.
Go to Image > Adjustments > Auto Levels. Set the Blending Mode of this layer to Overlay.
Using a Soft Eraser tool of size 200, erase those areas outside of the painted graffiti so you can see some dirty brick outlines on the colors.

11 September 2008


7 September 2008
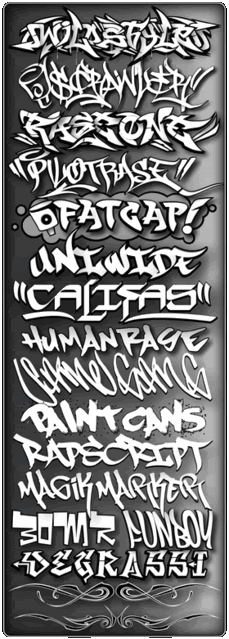
10000 fonts pack

The archive contain more than 10000 fonts and all are most wanted ones which will be more helpful for you
some of the fonts are
* transformers
* matrix
* and more....
this pack also contains cartoon fonts and animal fonts....
download
http://rapidshare.com/files/109838279/AA.zip

Photoshop Tutorial-make an amazingly fresh text effect
First,start by opening a new 500×375 file
set the foreground color - 7d0909 and the background color - c72d2d

Now choose the Foreground to Background gardient,and add a radial gardient in the center,add V on reverse.

Add a new text saying “EFFECTS”,I used “Neographik MT Std” but you can use whatever you want,this is just how i use the layer style.

Now for our main part,use this setting on blending options:


And now,duplicate the layer , change the font to Alba (http://www.dafont.com/alba.font) and the size to 81,make sure you use the same layer style as the EFFECTS,and change the text to “amazing”.

That’s it! beautiful work!

u can use some of the flower Brushes
set the foreground color - 7d0909 and the background color - c72d2d
Now choose the Foreground to Background gardient,and add a radial gardient in the center,add V on reverse.
Add a new text saying “EFFECTS”,I used “Neographik MT Std” but you can use whatever you want,this is just how i use the layer style.
Now for our main part,use this setting on blending options:
And now,duplicate the layer , change the font to Alba (http://www.dafont.com/alba.font) and the size to 81,make sure you use the same layer style as the EFFECTS,and change the text to “amazing”.
That’s it! beautiful work!
u can use some of the flower Brushes
2 September 2008
Collection of Fonts - IconsButtons
Collection of Fonts - IconsButtons

40000 Collection of Fonts - IconsButtons
The Pack contains various Fonts, Icons, Buttons. Almost around 2000 Fonts + 10000 Icons & 20000 Buttons which can be used for making sites, AIO’s, etc…
Note: The link is an exe file, you don’t have to run the exe if you don’t want to, simply extract everything by right-clicking on the exe file. Thank you.
Rapidshare: