
That tutorial show you how to swap the faces of people from 2 different images.
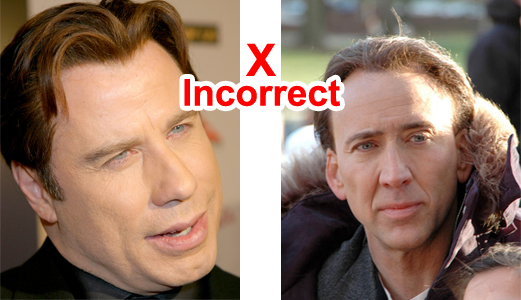
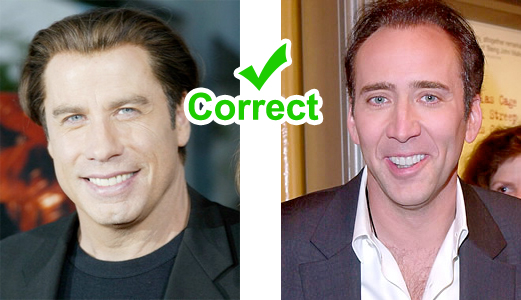
Note: Avoid using images with facial hair or glasses, wait until you’re more comfortable with the basic technique, then move on to more complex photos. Also, for this tutorial I used small photos but you will have an easier time editing the little detail if they are larger.
STEP 2: Copy the face you want to Swap
Select the Lasso tool in your tool box, and make sure the feather is 5px (in the top of the page)
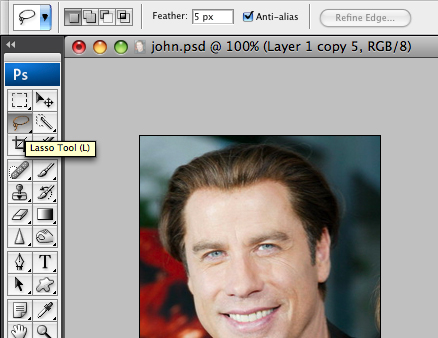
Now carefully circle the face, including all unique characteristics like wrinkles or dimples, and just a small section of the forehead. Once you have a selection, copy it (Edit>Copy or ctrl+c)
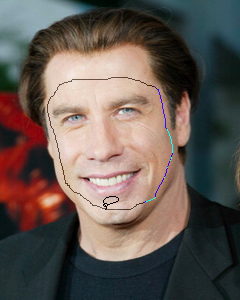
STEP 3: Paste the face onto the other head
Select the document with the second image, if you haven’t opened it… go ahead. Create a new layer by going to Layer>New>Layer, and paste the face (Edit>Paste or ctrl+v).
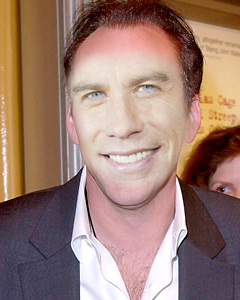
STEP 4: Transform to fit
Depending on your choice of photos, you might have a lot or a little to change concerning size and angle. To make the pasted face fit properly onto its new head, use the Free Transform tool (Edit>Free Transform or ctrl+t) to change the size or rotate it. In my case I had to rotate the face slightly clockwise, decrease the size, and make it narrower because Nicholas Cage has a long face in comparison.

STEP 5: Adjusting the Color
There are two main adjustments you should use: Hue/Saturation, and Brightness/Contrast. The settings I’m about to show you may be different with your images. You might need to add little or no Hue/Saturation but a lot of Brightness/Contrast, or the other way around. So keep that in mind, and play around with the values to see which gives you the best results.
First you want to make sure the new face matches the color of the new head. Select the face layer and go to Layer>New Adjustment Layer, choose Hue/Saturation. Make sure to check the box that says: “Use Previous Layer to Create Clipping Mask.” Use the following settings:
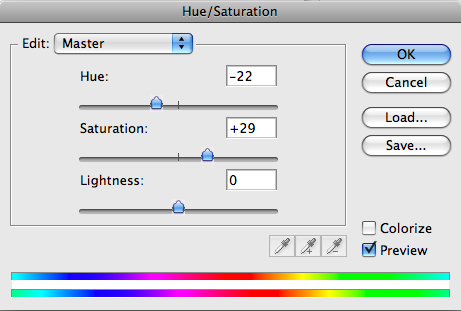
As I stated earlier, if you are using your own images these settings will probably be different, play around with Hue and Saturation, but don’t change Lightness unless you really have to for the sake of the color. You will use a different adjustment layer for the brightness. Now you should have something similar to this:
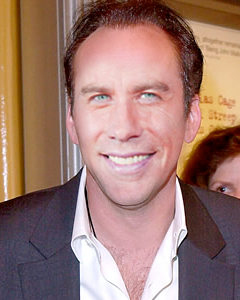
STEP 6: Adjusting the Brightness
Now you want to adjust the face so it matches the brightness and contrast of the head. Just as you did in Step 5, go to Layer>New Adjustment Layer and make sure to check the box that says: “Use Previous Layer to Create Clipping Mask.” Use the following settings:
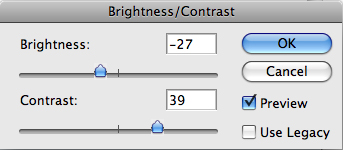
If these settings do not give you a proper result play around with the Brightness and contrast until the face looks natural on the head. You should now have something similar to this:
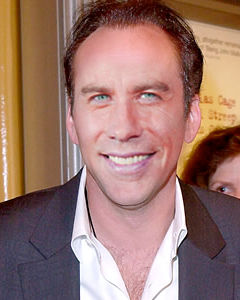
STEP 7: Erase the unnecessary face edges
Clean up the face by selecting the eraser tool with these settings:
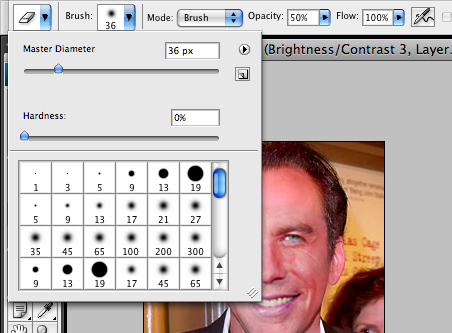
If you are using a larger image, use a larger brush size. Now carefully erase the areas around the face so there is no extra parts coming out of the head area. You can also erase parts that are not imporant, like some of the forehead area or side of the face, to better blend the face.
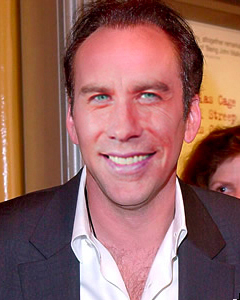
STEP 8 (Optional): Darken edges & spots with Burn tool
Your image should be looking pretty good by now, but there are still a few things to prefect it. Select the Burn tool from your tool box and use these settings:
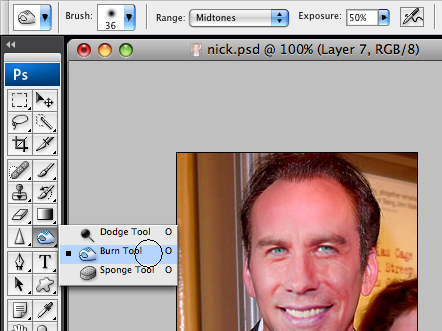
You can use the same sized brush as you did for your eraser in Step 7. Now carefully burn spots in the image that are too bright and don’t fit with the rest of the face. If you don’t have this issue, you can skip this step. For my image, I need to darken the sides of the face, around the left of the nose, and above the nose. By now, the face should look natural on its new head.
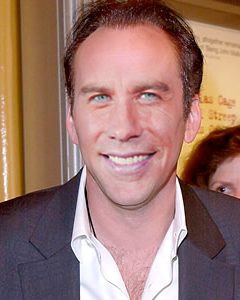
STEP 9 (Optional): Sharpen
Only do this if your face is blurry from resizing and rotating it earlier. If the face looks perfect already, or if you find that sharpening it only makes it worse, disregard this step. Select the face layer and go to Filter>Sharpen>Sharpen.
Note: If your image is blurry, and sharpening it makes it TOO sharp, instead go to Filter>Sharpen>Unsharpen Mask and play around with the settings to get a result you like.
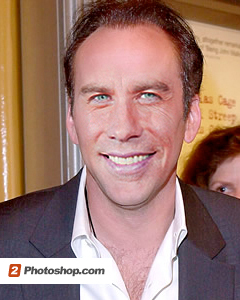
You are done!
Using the same exact method, but slightly different settings in the Brightness and Hue adjustments I took Nicholas Cages’ face and placed it on John Travolta’s head:
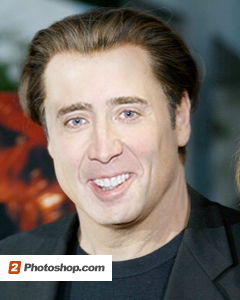
Tips:
Once you get more comfortable with this technique, you can start swapping faces onto another head with facial hair. In such a case, all you have to do is erase the section of the new face that covers the mustache or beard. In case of glasses or sunglasses, with the Lasso or Pen tool carefully select the glasses and copy them, then paste them above the new face and place them as you see fit.








0 comments:
Post a Comment